Friday, February 14, 2014

Chewy Valentine's M&M Cookies


Happy Valentine's Day!

I don't know about you, but Valentine's Day has to be my least favorite holiday in the world. As a child who was somewhat different from most of my peers, Valentine's Day really served as a reminder that I was a little weird. Other girls in my classes would end up traipsing home with a folder stuffed full of Valentine's, while I returned home with a few. Does anyone else think kids should have to bring Valentine's for their whole class? I think this might be the policy in most classrooms these days, but not so in my day.

I didn't develop a deep and abiding love for Valentine's Day later in life either. I hated Valentine's Day all through high school, college, and the early days of my career. It never failed that everyone else seemed to get flowers and chocolates when I never did. It's not fun feeling left out, and that has always seemed to be the purpose of the day. Look at the flowers I received. Look at that giant teddy bear someone bought me. Look how much someone loves me. Don't get me wrong, this post is not meant to be one long complaint. I just think there are better ways of showing your partner you love them. As an adult, I feel somewhat indifferent towards the holiday. I have a Valentine, I just choose not to lord that over the rest of the world. Especially towards people that may be feeling a touch left out. I also firmly believe in treating your partner well every day of the year, not just on a day when corporate America tells you to.


I may dislike the holiday, but there's nothing wrong with Valentine's treats! Anyone, regardless of romantic status, can whip up some cupcakes or cookies. In fact, I recommend it. Relationships may be temporary, but chocolate is forever. Right?? Absolutely.

Rest assured friends, this holiday is only one day. Everyone will go back to yelling and talking smack about their partners tomorrow :) Joking!


Ingredients:

3/4 cup butter, melted
3/4 cup brown sugar
1/2 cup granulated sugar
1 egg + 1 egg yolk
2 tsp vanilla
2 1/4 cups flour
1 1/2 tsp cornstarch
1 tsp baking soda
1/2 tsp salt
1 1/2 cups Valentine M&M's

Directions:

1. In a large bowl, combine butter and sugars. Whisk until no lumps remain. Mix in egg and egg yolk. Mix in vanilla.
2. Add flour through salt to the bowl. Whisk to combine. The dough will be very soft. Mix in M&M's with a spatula. Chill dough in fridge for 1 hour (this is a must).
3. Preheat oven to 350º. Line 2 cookie sheets with parchment paper. Place dough on countertop, allow to come to room temperature for 10 minutes.
4. Using a 2 tbsp cookie scoop roll cookie dough into a little log. Yes, not a ball, a log. A short, stout log. Stand the logs up tall on the cookie sheet. Take care to make sure the dough is pretty secure on the cookie sheet. If your little log falls in the oven, while it will still be delicious, it will resemble a biscuit rather than a cookie. These cookies fall and spread, so making them little logs allows them to spread into a perfect cookie. Place 9 logs on a sheet.
5. Bake in preheated oven 11-13 minutes. Cookies will look under-baked in the middle, but they are done. Allow to cool 10 minutes on the cookie sheet before removing them to a cooling rack. Cool completely before storage.


Thursday, February 13, 2014

Easy Raspberry Jam


Occasionally, the craving for raspberry strikes in the dead of winter. In the dead of endless winter snowstorms even. Thank goodness for frozen raspberries is all I have to say. 

Add jam to the list of items I won't be purchasing anymore, along with salsa, applesauce, chicken broth, pizza dough, etc. It's so easy. I'm serious! Raspberries (and blackberries) lend their own pectin to the jam by form of their seeds, meaning there are only 3 ingredients in this jam. It took me 10 minutes to make, and it stays good for up to a month in the fridge. You could even take this to the next level, and can it. This recipe provided 2 small mason jars worth of jam. One jar will be consumed, uh, probably immediately, but I froze the second jar.  


Let me tell you how crazy my raspberry addiction is. It's pretty bad. I usually test to see if the jam is ready by putting a dab on a small dish, and then place the dish in the freezer. If the mixture gels after 1-2 minutes, the jam is ready. When I pulled my dish from the freezer to check it, it was indeed done. The jam also looked pretty good on the plate. So I licked it up. That's right, plate to face. I lapped it up. It's too good to waste even one drop. I might need help.

Tomorrow will be all about Valentines Day cookies! I made M&M Valentines Cookies yesterday, and they turned out amaze-balls. I'm glad I took pics of them right after they came out of the oven, because the hubby consumed quite a few upon returning home from work. He's a cookie monster :) As for today-

Peanut butter and jelly sandwiches for all!


Ingredients:

24 oz frozen raspberries, defrosted
3 cups sugar
1 tbsp lemon juice

Directions:

1. Combine all ingredients in a large saucepan over medium-high heat. Bring mixture to a rolling boil. Place a candy thermometer in the mixture. Cook until jam is 221º. Place a spoonful on a small plate, place in the freezer for 1-2 minutes. If mixture gels, the jam is ready. If not, cook 2-3 more minutes. 
2. Allow jam to cool completely before storage. Jam can be canned or frozen. Stays good in the fridge for up to 1 month in an airtight container. 

Recipe adapted from Martha Stewart

Linked to: Weekend Potluck

Tuesday, February 11, 2014

Spicy Shrimp and Pepper Pasta


Ugh, I'm not having a good Tuesday.

I'm dog-less today. The pups are off at the vet, having their teeth cleaned. While I'm sure they aren't having fun there, I'm definitely bummed. I hate days without my dogs. There is an empty heating pad on the couch next to me, with the Blue Monkey perched and lonely sitting atop it. The Blue Monkey also misses his friend. The dogs will be home in a couple of hours, but in the meantime I'll keep glancing at their toy box full of goods, wishing Gizmo was here to give me the stare-down for a tug of war. 

I think I'll also comfort myself with some pasta. Give me shrimp and pasta (together, please!) and I'll be your best friend for life. Seriously. 


This dish has just the right amount of spice. Even the hubby agreed. He's not the biggest pasta person (I seriously don't understand you non-pasta lovers out there), so I was shocked when he went back for seconds. And then proceeded to tell me how much he liked it. I'll take it! The sauce is pretty basic, as I was not wanting to veer into marinara territory, so don't omit any ingredients and I highly recommend not skipping the basil and the cheese. 

One last thing before I go- I did manage to finish watching "12 Years A Slave". Wow. Let me put this out here- I hated every single second I spent watching that movie. It made me brutally sad of what humanity is capable of. That being said, it's a great movie with a great message. The horrors in history are not for the faint of heart. I know I'm faint of heart, the rewatch-ability of this movie is a big, fat zero for me. That's ok, another Best Picture nominee down. We only have "Nebraska", "Dallas Buyers Club", and "Philomenia" left. Getting er' done!

Happy Tuesday friends!


Ingredients (serves 4):

1 tbsp olive oil
1 red pepper, thinly sliced
1 orange pepper, thinly sliced
1 yellow pepper, thinly sliced
1 onion, thinly sliced
3 garlic cloves, minced
2 (15 oz) cans diced tomatoes, undrained
1 cup tomato sauce
2 tsp kosher salt
1 tsp black pepper
1/2 tsp crushed red pepper
10 oz dried fettuccine
1 lb uncooked shrimp, peeled
1/4 cup fresh basil, chopped
garnish- Romano cheese shavings (optional)

Directions:

1. Heat olive oil in a large, wide-sided pan over medium-high heat. When warm, add peppers and onion to pan. Sauté 5-7 minutes, or until peppers and onion begin to soften. Add garlic to pan, sauté 30 seconds or until fragrant.
2. Add diced tomatoes through crushed red pepper to the pan. Bring sauce to a boil, then lower to a simmer. Simmer 10-20 minutes while you cook the pasta.
3. Cook pasta according to package directions. When pasta has 3-4 minutes to cook, add shrimp to the tomato sauce. When pasta is cooked, drain, and add to the tomato sauce. Toss to combine.
4. Shrimp should be cooked at this point. If they are not, continue to toss pasta over heat for another couple of minutes or until shrimp are pink and opaque. Sprinkle basil over pasta. Season to taste with salt. Divide pasta among plates and top with Romano cheese shavings. Serve immediately.


Linked to: Weekend Potluck

Sunday, February 9, 2014

For The Birds


Female cardinal at the feeder.

Nerdy confession time-

I really like bird-watching.

I mean,  I really, really like bird watching. They fascinate me. I could spend an afternoon in a chair by my French doors leading to the backyard, camera in hand, endlessly watching them fly from one tree to another. The hubby and I have acquired 2 bird feeders (and 1 one squirrel feeder that's now a woodpecker feeder) thus far, and I think it's just the beginning. I'm so excited to get some birdhouses in the spring to try and attract some nesting families. 

Are you snickering at me yet? Probably, but that's ok. I'm ok with my avian love. On that note, yes, I've taken lots of pictures of those flying, feathered creatures in my backyard. In the snow no less!

This is my squirrel feeder that now appears to be a woodpecker feeder. This is the female woodpecker at her claimed meal spot. She loves banging away on it.

This is Woody, the male woodpecker.. He's never far from the house, you can always here him when you go outside. He's the loudest woodpecker I've ever known.

A fat little bluejay.

The female woodpecker likes the other feeders as well.

The female cardinal guarding the feeder from what appears to be a finch (or chickadee? Don't know on that one).

Male cardinal by the re-claimed squirrel feeder.

I just love male cardinals.

Nuthatch at the feeder.

I found the female woodpecker's hiding spot!

She's a crafty one :)
I hope everyone is having a wonderful weekend! We've still got inches of snow on the ground (although not nearly as much my loved ones in Oregon who have received 13 inches of snow in the last couple of days!), which I'm not loving. Our private lane is packed hard with ice, making it hard to get out of the house. The roads are clear if we can get off our private lane, which takes some effort. There's also a chance of more snow in the forecast. I bet you can guess what we're doing today... That's right! Hunkering down and watching movies!

Are we the most exciting couple ever or what?

Happy Sunday friends!

Friday, February 7, 2014

Chicken, Bacon, and Avocado Salad


Just because it's a salad doesn't mean it has to be bland and tasteless. Throw on some homemade dressing, crunchy bacon, and creamy cheese, and you've officially upped the ante on your salad. I wouldn't have it any other way. I love salads, the hubby and I have them quite often. Hey, when you bake as much me, you cut calories where you can as to enjoy said baked goods.

Some of you may be skeptical about the combination of bacon and raspberry vinaigrette. Don't be. I used to have such an aversion to the combination of fruit and meat. No pork chops and applesauce. No halibut with mango salsa. No cherry-mint sauce on my lamb. No way, no how. Today... not so much. Fruit and meat make the perfect combination. There's something about activating those sweet- then salty, savory tastebuds at the same time. It's magical. If you haven't jumped aboard this runaway train, I suggest making today the day.


Does anyone have anything fun planned for the weekend? I think the hubby and I are going to hunker down. We've still got about 3 inches of snow on the ground, which is packed hard and now ice. Snow is currently falling with more on the way tonight. And we've still got 3 or 4 Best Picture nominees to watch, not to mention trying to finish "12 Years A Slave". I also happened to make chicken broth this week, so I might make a hot, cozy batch of some sort of soup. Or maybe hot chocolate in the crock pot. Er, now I'm getting excited about cooking something and it's 8:16 am. Oh dear. The hubby's in for a long day :)
I hope everyone has fantastic, tasty, WARM weekend!


Ingredients:

Raspberry Vinaigrette (store leftovers in fridge up to 2 weeks)-
1/2 cup olive oil
1/4 cup frozen raspberries, thawed
3 tbsp white wine vinegar
2 tbsp seedless raspberry jam
1 tbsp sugar
1 tbsp Dijon mustard
1 tsp poppy seeds
1/4 tsp onion powder

Salad (serves 2)-
2 slices bacon, chopped
6 cups romaine lettuce, chopped
8 ounces cooked chicken breast, chopped
1/2 avocado, chopped
2 ounces blue cheese, crumbled

Directions:

1. To prepare dressing- combine all ingredients in food processor. Pulse until completely smooth. Store in fridge until ready to serve.
2. To prepare salad- Render bacon in large, hot skillet. When browned, remove with a slotted spoon and drain on a paper towel. In a large bowl combine lettuce, chicken, avocado, blue cheese, and drained bacon. Drizzle with dressing to taste. Toss to combine. Divide salad among 2 plates, and serve immediately.

Raspberry Vinaigrette recipe adapted from Food.com

Thursday, February 6, 2014

Oatmeal Creme Pies


a.k.a Homemade Little Debbie's Oatmeal Creme Pies!

These were made via special request. I just love special requests, I hardly ever get them! I'm sure in 20 years when I've had LOTS of requests, it won't be so special, but for now, I lurve it. The hubby came home from work earlier in the week, and asked if I could buy him some Little Debbie's Oatmeal Creme Pies. Apparently, someone at his office had been eating one and now the craving monster had struck. I politely asked him if I could make them instead. I got an enthusiastic thumbs up. Score!


So here they are! I'm not even a fan of those Little Debbie's but I could eat a truck load of these! The cookie is soft and chewy, and the cream tastes wonderfully homemade (i.e. not like the cream in Oreo's or Hostess Ding Dong's). They really didn't take any more effort than say, making cupcakes. You make the cookies, then you make the frosting. Easy peasy, right? Right.

These cookies may be fairly easy to make, but there is one thing they are not- and that's low cal. I firmly believe a few calories won't kill me, so I'm ok with this. Just don't go assuming that since these are oatmeal, they're healthy. They are sooooo not.


Lastly- The recipe I used models these cookies after the Giant Oatmeal Creme Pies, so the cookies are large and in charge. I found out after making them that my husband likes the little Oatmeal Creme Pies, which are mainly just small, thinner cookies with less cream filling. These recipe calls for a 2 tbsp cookie scoop, but if you wanted to make the cookies smaller and thinner, use a 1 tbsp cookie scoop. You'll have double the cookies, but someone out there will really love you if you bring them some of these cookies!

Is everyone having a fabulous Thursday? I should hope so, it's almost Friday :)


Ingredients (makes 16-17 sandwiches):

Cookies-
1 1/4 cups unsalted butter, softened
1 cup brown sugar
1/2 cup granulated sugar
1 egg, room temp
2 tsp vanilla extract
1 tbsp molasses
1 1/2 cups all-purpose flour
1 tsp baking soda
1/2 tsp salt
3/4 tsp cinnamon
1/4 tsp cloves
3 cups uncooked quick-cooking oats

Creme-
3/4 cup unsalted butter, softened
3 cups powdered sugar
3 tbsp heavy cream
1 1/2 tsp vanilla extract
pinch of salt

Directions:

1. Preheat oven to 350º. Line 2 cookies sheets with parchment paper. Set aside.
2. In a large bowl, cream together the butter and sugars until pale and creamy. Mix in egg, vanilla, and molasses.
3. In a separate bowl, whisk to combine flour through quick cooking oats. Add dry ingredients to wet, and mix. The dough becomes very thick after a couple of seconds, you may need to turn the mixer off and finish mixing the dough by hand.
4. Using a 2 tbsp cookie scoop, drop dough onto cookie sheets 2 inches apart. Cookies spread significantly. I placed 9 cookies per sheet. Bake in preheated oven for 10 minutes, or until edges are golden brown. Cookies will look underdone, but they should be pulled anyway. Allow to cool 3 minutes on the cookie sheet, then remove to a cooling rack. Let cookies cool completely before frosting and sandwiching.
5. To prepare frosting, beat butter in a large bowl for 1 minute, or until creamy. Add powdered sugar, and beat for another 2-3 minutes. Mix in heavy cream, vanilla, and salt. If frosting is too thick, add a touch more cream.
6. To assemble cookies, spread about 1.5 tbsp's frosting on the bottom half of a cookie, then sandwich with another cookie. Store cookies on the counter in an airtight container up to 2 days. After 2 days, cookies should be refrigerated to maintain the best quality.

Recipe by Sally's Baking Addiction.
Linked up to: Weekend Potluck

Tuesday, February 4, 2014

Creamy Blue Cheese Dressing


I was hoping to bring you guys a post on Buffalo Wings today. Unfortunately, we ate them all. Fast. I hate when that happens. Next time friends, next time. Buffalo wings are only as good as their dipping sauce, however, and I did manage to document my blue cheese dressing. Which, I might add, is better on a whole heck of a lot more than wings.

4 years ago, when the hubby and I were celebrating our first Super Bowl together as a married couple, I first decided to make a homemade blue cheese dressing. I don't remember what recipe I used, but the dressing was so gross. It had huge chunks of blue cheese in it, and I don't mean that in a good way. I decided to take an immersion blender to it. Rookie mistake. Literally. The second I turned the blender on the dressing seemed to explode. There was dressing everywhere, blue cheese splattered on the ceiling. In my eyelashes. And on my Uggs, which at the time were brand-new. I yelped and ran upstairs to clean the poor Uggs, which in my new owner-dom I hadn't managed to waterproof yet. Not that waterproofing would have helped against an oily dressing, but moving on... I did manage to get the dressing off my Uggs. They are still alive to this day. The dressing was another story. It was chucked, and off I went to Winco to feverishly look for a container of commercially prepared dressing. On Super Bowl Sunday. 30 minutes to kick-off. What a day.

FYI- I did make it home for kick-off that fateful year WITH dressing in hand.

The moral of the story? Make your dressing ahead of time, or at least try your recipe before the big day. This recipe is tried and true, and good on veggies, salads, crackers, and of course, wings! To my mind, this is exactly what blue cheese dressing should taste like. The recipe makes quite a bit of dressing, I'd cut the recipe in half if you just want to keep it in the fridge for munching or salads. I've found it stays good tightly sealed in the fridge up to 2 weeks.

Happy Tuesday! 

Ingredients:

1 cup mayonnaise
1 cup sour cream
1 1/2 tbsp dried parsley
4 ounces blue cheese, crumbled
1 tsp lemon juice
1 tsp Worcestershire sauce
1/2 tsp black pepper
1/4 tsp salt
1/4 tsp garlic powder

Directions:

1. In a food processor, combine all ingredients. Pulse to get desired texture. Add more salt or pepper to taste. Chill in fridge until ready to serve. Store in an airtight container in fridge for up to 2 weeks.

Recipe adapted from Allrecipes.com.

Monday, February 3, 2014

Loaded Baked Potato Soup


It's hard being a food blogger.

It does not come naturally to me, I'll tell you that. Maybe someday having a camera in my hand will be second nature, but I'm not there yet. Here's the scoop on this dish-

I'd fully planned on featuring this soup on my blog. Most of the time, I'm packaging up my food and waiting for morning light to photograph my food. I'm a small-time blogger, I can't really justify buying expensive lighting equipment at this time in my life. This means I photograph all my food at exactly 1 pm. I always try to be home at 1 pm. It's a little irritating, but it works for now. So what did I do with the leftovers of this soup after the hubby and I had feasted on it? I packaged it all up to freeze. All the packaging had to be undone so I could remove a bowl. If you vacuum-pack soup, you know how messy this can get. Grr.

Cut to next day. There I am. The soup had been heated up. Styled to look oh-so pretty. I'm snapping away, only 12 pictures in. Then... the camera battery died. Dun dun DUN.  I stood there and stared at my soup. I knew I hadn't taken enough pictures. Should I charge the battery, leave the soup, and come back? The camera battery would take a couple of hours to charge, the soup would look very tired after a couple of hours. Plus, it was my lunch. And it looked awfully yummy.  Man, this soup just didn't want to be featured on the blog. In the end, of course, I ate the soup. I was satisfied with the photographs I took, and my stomach was happily full of soup. Hey, you gotta do what you gotta do.

Now it's Monday. Monday's are usually my big day. I grocery shop, do the laundry, vacuum and dust the house, and prepare the hubby's lunches for the week. This gives me plenty of time to go to the gym, play with the pups, bake, and take photographs the rest of the week. Welp, I just woke up to about 5 inches of snow. Not sure I'm going to make it out today. All I can say is if I don't make it out, expect to see pictures of a snow family in my yard :)


Ingredients:

5 lbs baking potatoes
7 slices bacon, chopped
1 onion, chopped
1 tbsp minced garlic
2 tsp kosher salt
1 bay leaf
1 quart 1% milk
2 cups chicken broth
1 tsp pepper
garnish: shredded cheddar cheese and thinly sliced green onions

Directions:

1. Preheat oven to 400º. Scrub all potatoes and pierce with a fork. Place potatoes on a cookie sheet and bake in preheated oven for 1 hour. Remove from oven, place in a large bowl, and partially mash potatoes with a potato masher (skins and all).
2. In a large stockpot over medium-high heat, render bacon until browned and crisp. Remove bacon from pan with a slotted spoon, drain on a paper towel. Set crumbled bacon aside.
3. Add onion to bacon drippings. Sauté 5 minutes, or until tender. Add garlic, salt, and bay leaf to pan. Sauté for 30 seconds. Add milk, broth, potatoes, and pepper to pan. Lightly simmer soup for 10 minutes, stirring often. Do not allow soup to come to a rapid boil.
4. Ladle soup into bowls and top with crumbled bacon, cheese, and sliced onions. Serve immediately.

*This recipe makes about 18 servings. If you don't want the leftovers (say, to freeze for later), cut the recipe in half or more.
Recipe adapted from Cooking Light
Linked up to: Weekend Potluck

Saturday, February 1, 2014

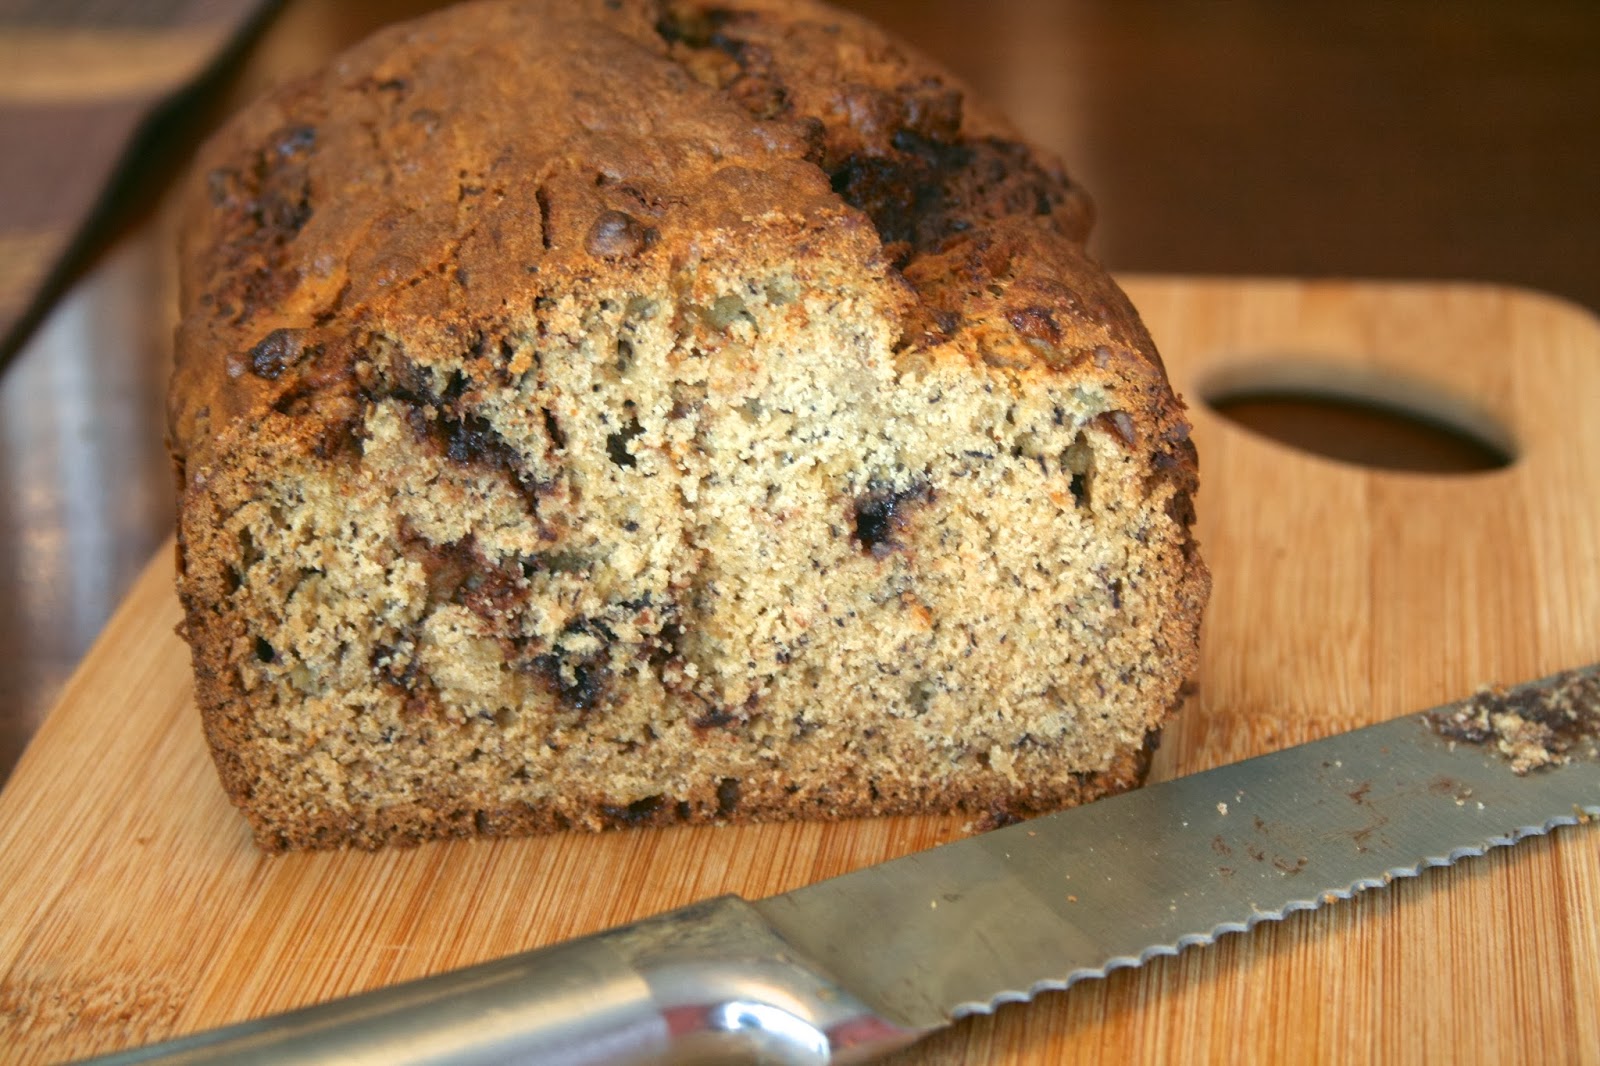
Nutella-Swirled Banana Bread


We're finally getting a break from the polar vortex!

Oh my goodness, it was 46º yesterday. It felt like a veritable heat wave. The boys (who have a touch of cabin fever) got to be outside for about an hour yesterday. This may not seem like a long time, but I say their total daily outdoor time has been 10 minutes or less for the past week. For Chihuahuas, an hour is a long time. I love it too though. How wonderful to not have to strap on 5 layers to walk out the door! The high for today is supposed to be 55º, which naturally has me chomping at the bit to run outdoors. I haven't ran outdoors since my last 5k, which was December 19th. I think it's time. I'm really going to start February on the right note :)


And then... I can come home and gobble up this quick bread, which (let's be honest here) is basically glorified cake. I guess if you did qualify banana bread as cake, it would be one of my favorites. I'm one of those people who's pretty much anti-frosting. It's all about the cake for me. If it's moist and flavorful, I scrap the frosting right  off the cake. Which makes banana bread perfect for me. While frosting may be the enemy,  I am not, however, opposed to Nutella swirled throughout the cake. I love finding the little pockets of Nutella nestled inside the bread. I strongly suspect kids would especially love the Nutella addition.

Short entry today- I've got a full to-do list today. Doggie time, running, doing a photo shoot for my Loaded Baked Potato Soup, making Homemade Egg McMuffins for the hubby, making Blue Cheese Dipping Sauce for the Superbowl tomorrow (Yippee for the Superbowl!!!), shower, studying "The Science of Good Cooking", and making dinner. Whew.

Have a great weekend everyone!


Ingredients:

2 cups all-purpose flour
1 tsp baking soda
1/4 tsp salt
1/2 cup unsalted butter, softened
3/4 cup brown sugar
2 eggs, room temp
2 tsp vanilla
3 very ripe bananas, mashed
1/2 cup Nutella

Directions:

1. Preheat oven to 350º. Coat a loaf-pan with cooking spray. Set aside.
2. In a large bowl, whisk to combine flour, baking soda, and salt. Set aside.
3. In a separate bowl, cream butter and sugar with a hand mixer until there are no more lumps. Mix in eggs. Mix in vanilla. Mix in bananas. Using a spatula, add dry ingredients. Fold together until batter is just barely moistened. You don't want to over mix and end up with a tough bread.
4. Spread half the batter into the loaf pan. Drop 1/4 cup Nutella in spoonfuls on top of batter. Using a knife, swirl the batter. Spread the remaining batter on top of the swirled batter. Drop the remaining Nutella in spoonfuls on top. Using the knife, swirl the top of the batter.
5. Bake in preheated oven 30 minutes. Check bread to make sure top is not browning too much. Cover the bread with aluminum foil if it looks too brown on top at any point. Bake bread a total of 45-65 minutes. Bread is done when a clean knife inserted comes out clean, or the internal temperature is 190º.
6. Remove from oven. Cool in loaf pan 30 minutes, then remove to a cooling rack. Allow bread to cool another 60 minutes before slicing to ensure bread cohesion. Cool completely before storage.


You also might like my Simple Banana Bread!