Tuesday, August 19, 2014

Layered Strawberry Parfaits


Creativity. A concept I ponder often. I don't consider myself the most creative person in the world, but I'm not going to deny that there's a certain degree of innovation bubbling underneath the surface. Sometimes ideas come, and I run with them. It's funny, because when I get an idea, I tend to think I'm brilliant for coming up with it. In the case of this particular dessert, however, I discovered my creativity had a sneaky source. And did it ever burst my bubble. 

During the course of my brother's visit (which was awesome, by the by), we- the hubby, brother, and I- were at the grocery store. The bro saw berries on sale and decided he wanted berries and whip cream for dessert. Immediately after he said that, I imagined a layered dessert in a jar. I just so happened to have a box of Vanilla Wafers at home which I envisioned being perfect for the cakey-crusty layer. Voila, these parfaits were born. 


The catch didn't come until 2 days later. I was getting ready to leave the house for a doctors appointment and the boys were staying home to play video games. I picked up my library book off the coffee table to take with me, uncovering August's issue of All You, which I received last month. There, smack dab in the middle of the cover, was my layered parfait dessert. While I hadn't read the magazine yet, I must have quickly glanced at the cover and committed the image to memory. My creativity was a sham, and all 3 of us of knew it. We ended up having a good laugh, because if you can't laugh at yourself, what can you do?

While I may not be the most creative person in the world, my palette's got no problems. These parfaits are the simplest to make, and they are freakin' delish! There's only 3 ingredients-


1. Whip cream
2. Crushed vanilla wafers
3. Fresh strawberries!

For such a simple dessert, you'd be impressed. They are light, sweet, and fruity. The vanilla wafers absorb the cream, giving them a custard-y feel. I chilled mine for 24 hours, which I think allowed the wafers to soak up so much cream. It seriously only took about 10 minutes to make these! They'd be perfect for a last-minute get together with friends, they look way more elegant than they actually are. I made the cream in my stand mixer while I crushed the wafers and sliced the strawberries. Dessert doesn't get any easier than this.


I realized I was so frazzled yesterday, I didn't even post an update on the little bro's trip. He was here for a week, and I swear, fastest week ever. I blinked, and it was gone. I think he had a good time, though. We took him to Cincinnati, with the intention of taking him to a Red's game. We stayed with the hubby's cousin and his wife while we were in town, and the boys had a terrific time taking advantage of their pool and hot tub. While we all had fully planned on going to the game, we ended up at a bar across from the stadium where we watched the majority of the game. It was great fun, and I don't think anyone minded we didn't make it into the stadium. We laid low the rest of the week, and didn't really travel too much. I did make that Buffalo Chicken Pizza that the bro had been requesting, and it was worth the wait. It was delicious, and beautiful. I didn't get any pictures, so I'm recreating the pizza this week. It was that good! Before I knew it, the week was up and the hubby and I were dropping the bro off at the airport. I think we sent him home full, relaxed, and ready to jump back into things :)

The hubby and I's 10K is this weekend, so we are trying to take it easy on the running front. We are cross-training today, doing a short run tomorrow, and then taking 2 days off before the race. Our training schedule has us running on Friday before the race, but I'm skipping that. I know my body, and I run very well with 2 days rest under my belt. Fresh legs make me hap-hap-happy!

Have a great day! Happy Tuesday!


Ingredients (makes 2 parfaits):

1 cup heavy cream
2 tbsp sugar
2-3 drops vanilla extract
~2 cups vanilla wafers, crushed
1 cup strawberries, chopped

Directions:

1. Combine heavy cream, sugar, and vanilla in a mixing bowl. With an electric mixer, beat cream until light and fluffy, 5-8 minutes. Set aside.
2. To assemble the parfaits, spoon a layer of vanilla wafer crumbs into a tall glass or small mason jar. Spoon a layer of cream on top of the wafers. Top the cream with a layer of berries. Repeat layers.
3. Chill in fridge for 2-24 hours. Serve cold.


Looking for other strawberry recipes? Try these!


Monday, August 18, 2014

10 Summer Perfect Salads

It's Monday again. Hard to believe I've been away from the blog for a whole week. You would think a week was enough time to prepare a post, but then you would discover the reason school and I didn't get along. And the reason for that would be procrastination. I was lazy all weekend, so lazy I couldn't bother to point and shoot with that camera thingy. So here it is, Monday morning. I'm bright-eyed and bushy-tailed with no material to write on. The great thing about being a food blogger is that I've got troves of recipes to bring forth from the archives. Well, maybe not troves, but you get the idea. So I'll slink off into the shadows with my camera, to practice with my photography light. With any luck, I'll have new material for tomorrow. Without further adieu, lets jump right in!


Tomato Cucumber Mozzarella Salad- This is one of my favorite summer salads. It's a great way to use those summer bounties of tomatoes and cucumbers. Fresh mozzarella gives this salad a creamy twist, and you'd never know the dressing is simply lime juice and olive oil. This salad is a house favorite around here.


Buffalo Chicken Salad- Why wouldn't you want to eat this salad? Crispy, pan-fried chicken, brushed with spicy buffalo sauce. Paired with a creamy blue cheese dressing, this main-dish salad is also man-friendly. 


Chicken Caesar Pasta Salad- A combination of 2 of my favorite food items- pasta and Caesar salad. Making your own Caesar dressing out of Greek yogurt makes for a flavorful salad minus the calories and heavy-handed preservatives. Adding chewy pasta to this salad makes it unforgettable. 


SW Chopped Salad with Creamy Cilantro Dressing- Let me make this clear- I heart cilantro. I love it! There's something so magical about that first chop into a bunch of freshly picked cilantro. The smell that's released is fresh, delicious, and decidedly Latin. This creamy dressing really ties together this colorful, crunchy salad.


Chicken Bacon Avocado Salad- Do you like chicken? Bacon? Avocado? Blue cheese? Raspberry vinaigrette? Put all of these ingredients together, and you have a salad you'll be thinking about for days. Did I say thinking? I meant craving :)


California Cobb Salad- There's no reason not to make this main-dish salad. It's full of of the good stuff. Lots of protein from lean chicken breast and hard-boiled egg. Good fats from the avocado. Plenty of tomato and lettuce. And just enough bacon bits to make life interesting. Tie all of this together with a tangy Italian dressing, and I'll guarantee you won't be hungry after dinner. 


Mediterranean Falafel Salad- Break out of the box. Falafel is healthy, flavorful, and extremely affordable. Pair falafel patties with this Mediterranean salad for a meal-time adventure. Once you're a falafel convert, try it in pitas as a sandwich!


Chicken and Black Bean Salad- This is my Taco Salad without ground beef. This salad has a decidedly Mexican flair with its lime vinaigrette flavored with coriander, chili powder, and cumin. Flavorful chicken, creamy black beans, crunchy peppers and lettuce... I'm starting to get hungry :)


Greek Salad with Shrimp- What's a salad list without Greek salad? The hubby often asks if I could visit anywhere in Europe, where would I like to go? I often reply Greece. Gorgeous beach views, Mediterranean-inspired weather, a plethora of history, and Greek food? Yes, please!  Cucumbers, tomatoes, kalamata olives, pepperoncinis, feta, and succulent shrimp- only the best combination ever. I'll keep making this until I can experience true Greek food for myself.


Apple Walnut Salad with Poppyseed Dressing- This will become your go-to salad dressing if you make it. I promise you it will. We consistently have a bottle of this in our fridge at all times. It's the most amazing and flavorful homemade dressing I've ever made. I can't talk this dressing up enough, you must try it for yourself. Pair the dressing with this salad, or heck, pair it with any salad. The dressing is extremely versatile, it works with almost any ingredient you can think of to throw on a salad. Just trust me on this one. 

Hopefully I've given everyone some salad ideas. In the meantime, I'll be channeling my energy towards producing some new photographs. In between making cookies,  of course, since that's on my agenda as well. My house, cookie-less, just doesn't feel the same.

Happy Monday friends! Have a great week!


Monday, August 11, 2014

Mid-August in the Jarrell Garden


Hola! Happy Monday y'all :)

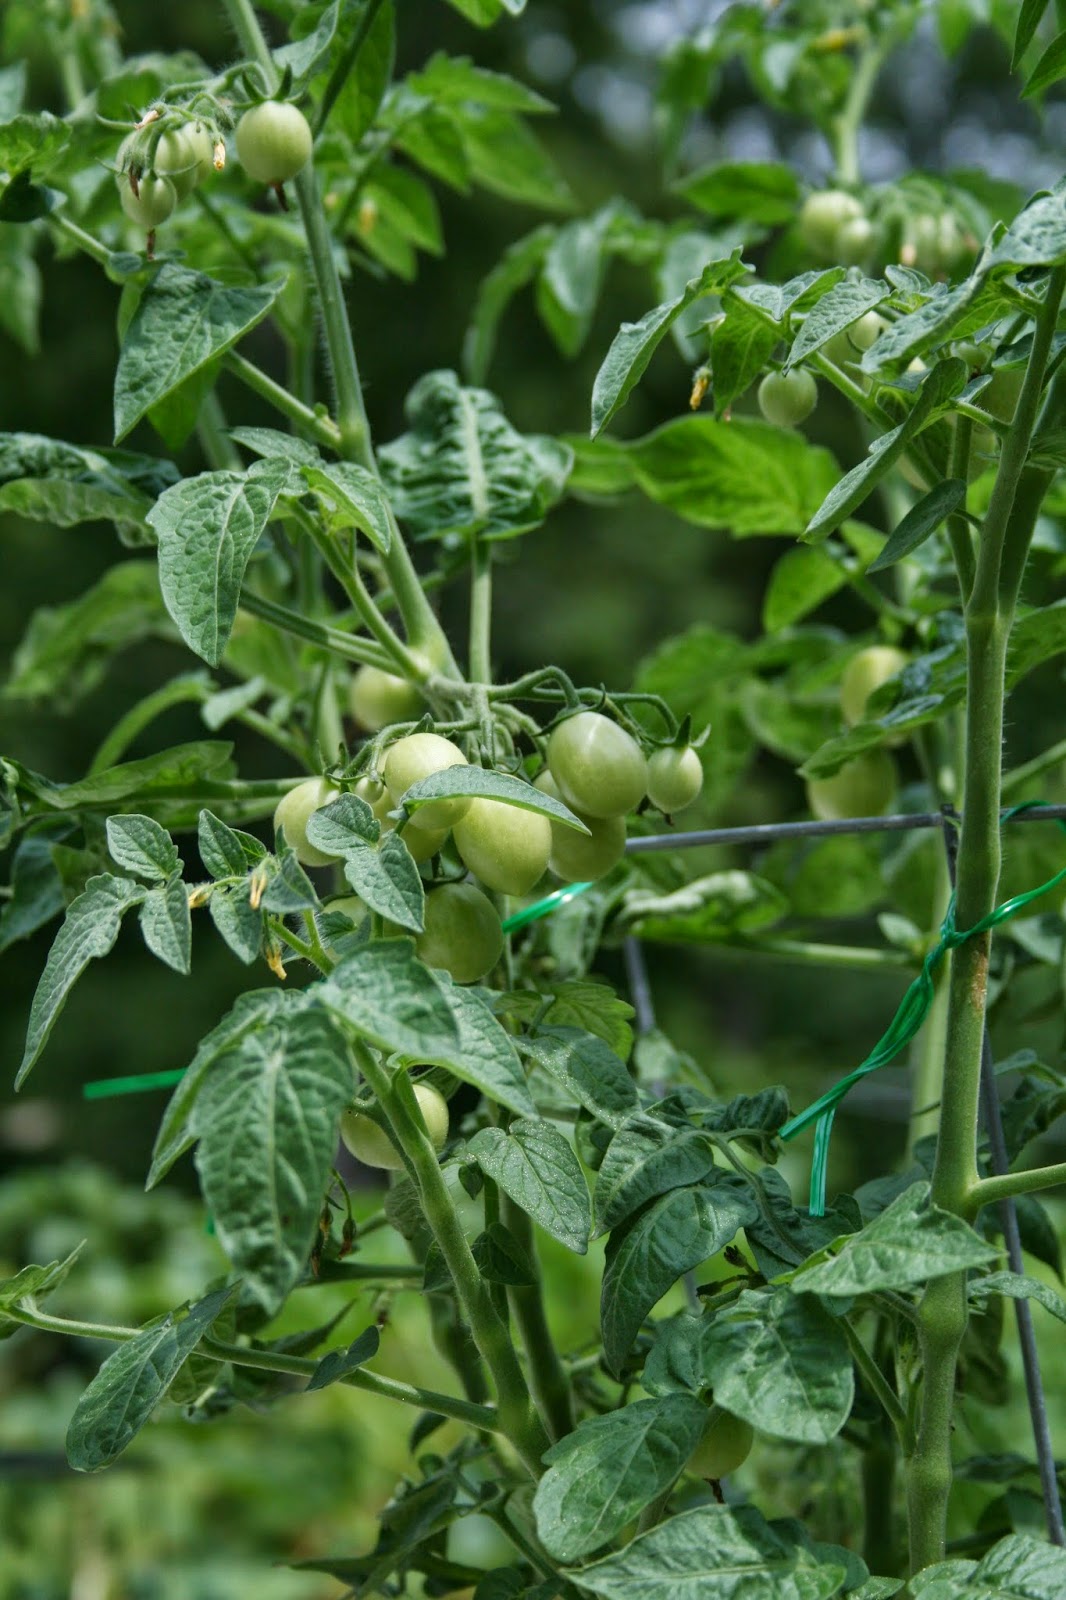
I missed updating the garden at the beginning of the month, but better late than never right? I just finished reading one of the blogs I follow and she was mentioning she's coming up on the last of her tomatoes. What??? Mine haven't even started yet. Everything in my garden is just starting to produce. 

-Hold the press. Just Googled this. It's apparently common for new gardeners to get nervous by the amount of green tomatoes hanging out on the vine this time of year. They will ripen. Eventually. I think I just have different varieties of tomatoes. 


Our garden path is finished! I just love it! It's so nice to be able to head out to the garden first thing in the morning and not have to worry about getting my shoes getting wet. Awesome sauce!


The raised bed tomatoes. Just for comparison, here's a picture of when we first planted those:


Yeah, I'd say those tomatoes have taken off! Plus, they have HUGE tomatoes on the vine-


Come on, ripen! :)


All the container tomatoes are doing pretty good. Even the Charlie Brown Christmas tree! I went psycho on it and hacked it up. Hacked it up good. I cut practically everything off of it, and now, it's coming back quite nicely. Plus, everything that has come back is green!


Romas on the vine...


Funny story. My pepper plants? Both have turned out to be jalapeño. I now have 3 jalapeño plants, and no other pepper plants. I'm puzzled as to what happened. I obviously mixed up some seed packets. Better labeling next year! In the meantime, anyone need any jalapeños???


I'm actually scared by the number of jalapeños on this plant :)


The cabbage appears to be making a head, so we'll see what we end up with at the end of the summer. 


Lettuce and Chard. This box is crazy. I've harvested the chard quite a few times and it just keeps growing back stronger than before. I'll definitely be growing chard again next year.


Cukes. I'm pretty sure I've been battling the cucumber beetle all season. Next year's goal will be to eradicate these damaging little bugs. I've been spraying the plant down with garlic and cayenne oil, which seems to be helping some. But not 100%. While the cucumbers might not look as pretty as I want, they still taste amaze-balls. 


Let's talk organic gardening, shall we? I saw this extremely strange site in my tomato plants. Upon first glance, I assumed it was a mass of insect eggs on a leaf. NO! This is a parasitized tomato hornworm. A braconid wasp laid it's eggs all over this hornworm. When the eggs hatch, they eat the hornworm and the hornworm dies. These hornworms are extremely detrimental to your tomato plants, so these wasps are a gardener's best friend! If you see this in your garden, leave it alone! These wasps also prey on aphids, beetles, and other bugs that destroy your plants. My favorite part about these crazy wasps? They don't have stingers! My new best friends :)


The herb garden. My 2 cents?

1. Why haven't I moved that mint? Insanity :)

2. Wow, that basil needs to be harvested.


I'll wrap this post with a picture of my favorite gardening partner :)

Have a great week friends!

Friday, August 8, 2014

Deep Dish Chocolate Chip Cookie for 1


This was supposed to be the first post brought to you by my new photography light. I know I said that awhile back, but this was really, truly supposed to be that post. I just couldn't stand the pictures. I'm still practicing. This shouldn't surprise me, considering how long it's taking me to get a hold on using my big camera. Call it my stubborn streak, I just keep plugging away until I get what I want. It's the best way I learn- taking tons and tons of ugly photos until the best way to get pretty pictures becomes apparent to me.

I'll share one picture from the experiment:


So, I think you can tell where the light is positioned in this photo. First of all, I'm pretty sure I chose the wrong white balance setting. The cookie is definitely a weird shade of yellow. Secondly, the shadows are all wrong. It's hard to see the ice cream scoop, which I don't like. Perhaps moving the food closer to the light will yield different shadows? Something to try. Thirdly, I think the photo would have benefited from more color. Maybe a different colored napkin to focus on, or even throwing in some chocolate chips to the picture to make it more interesting. As I mentioned, there is more work to be done. Practice makes perfect. And, also like I said before, lighting wasn't the only issue on this photo-shoot. 

Speaking of chugging along, that's how I stumbled onto this recipe. I first made it one lonely night many moons ago when the hubby was working a night shift, and the chocolate cravings made a late evening house call. Since then I've played with the recipe- different ratios, different kinds of chips, differed cooking times, substituting sea salt for regular salt, etc. I think I've finally narrowed down the best combination. Dark chocolate chips instead of regular, sea salt instead of plain, and the tiniest amount of vanilla bean ice cream dolloped on top. Seriously, these are perfect for a spur-of-the-moment craving. You know the one. The one that has you frantically pulling 8-year old packages of egg noodles and Chinese 5 Spice powder from the cupboard while you are desperately searching for a cookie. 

The best part? It's perfectly proportioned for one, and bakes in less than 60 seconds.


Oh yes. And, since it's a dessert for one, there won't be any leftovers lying around to tempt you. 

So, the little brother has arrived! I picked him up at the airport yesterday, looking a tad tired. He took the red-eye in, flying from Portland overnight and arriving at the local airport at 10:30 am. That's a rough travel time. Needless to say, yesterday was low-key. After getting back to the house, we pretty much lazed around the house and binge-watched "The League". It was the perfect day for adjusting to some jet lag :) Today won't be nearly as lazy, at least for me. The hubby and I have the hardest day of our training today, we are running 7 miles! My mind is spinning a bit, and I'm a bit anxious. I've never ran 7 miles. I know I'll be able to do it, but I'm definitely feeling a bit apprehensive right now. 


Now, I'm supposed to go run 7 miles after I've been staring at pictures of this cookie for the last hour, and all I wanna to do is cram it in my mouth? 

Tis' the life of a food blogger :)

Have a great weekend everyone!


Ingredients (makes 1 cookie):

1 tbsp unsalted butter, melted
1 tbsp granulated sugar
1 tbsp brown sugar
1 egg yolk
1/4 tsp vanilla extract
1/4 tsp sea salt
1/4 cup flour
2 tbsp dark chocolate chips
vanilla bean ice cream (optional-for topping)

Directions:

1. In a small ramekin, combine butter with sugars. Stir to combine. Add egg yolk, stir to combine. Mix in vanilla and sea salt. Add flour, stir to combine. Add chocolate chips, stir to combine.
2. Cook in microwave 35-50 seconds or until cookie looks done. (I've played with all combinations of times, but I've found exactly 50 seconds is the perfect cooking length in my microwave.) Serve warm, topped with ice cream (if using). 

Recipe adapted from My Happy Place.


If you liked this recipe, you may enjoy these:


Thursday, August 7, 2014

Homemade Marinara


Tomatoes. Tomatoes, tomatoes, tomatoes. 

I have them coming out of my ears. And they aren't even mine! I'll admit, I'm a little nervous as there are easily 30 green tomatoes out on my patio, awaiting their ripening destiny. What am I going to do when mine start coming in? Oh yes, the aforementioned tomatoes are from the hubby's uncle's garden. I used about 15 lbs to make marinara, and I think I've still got another 15 lbs in the fridge. And, I just woke up to a brand new bag of tomatoes on my doorstep. Sheesh. 

If you have tomatoes, tomatoes, and then some more tomatoes, marinara is a great way to use up some of them. I like to simmer my sauce for most of the day, so I don't peel my tomatoes or cut them up very much. After cooking in a stockpot for 5-6 hours, you are going to end up with broken down tomatoes, whether you chopped them or not. It's the perfect sauce if you are feeling lazy.


I mentioned before in my French Dip post that I had a bone leftover from cooking the roast. That bone simmered with this sauce, and made it amaze-balls. It's an almost vegetarian sauce! I'm telling you, bones a make a world of difference. And just think, all you have to do is save one from dinner, freeze it, and throw it in a sauce or soup at your leisure. I really can't advocate this type of recycling enough. It's the easiest way to sneak some incredible flavor into your dish. Another easy way? Save the rinds from your fresh cheese! Cheese rinds are amazing as well. In fact, I simmered a cheese rind in the sauce with the bone.

One more tip that made this sauce da bomb. I found a head of roasted garlic in the fridge, so I threw that in as well. Holy moly, it smelled amazing. I think you could sub plain garlic for the roasted, but dang, why would you want to? My advice? Roast that garlic :)


After simmering the sauce all day, I like to take my emulsion blender to it. Hence the reason I barely chop my tomatoes before I put them in the pot. A quick blend of the pot, and you have amazing homemade sauce. This recipe made a huge pot, I used a couple of cups of sauce for dinner that night, and then ended up freezing the rest. I was able to fill 3 freezer bags! Another batch is in the works, so I'm hopefully thinking I won't have to buy any jarred marinara this winter.

The little brother arrives today, everyone! I'm super excited. I'm off for a quick run, and then off to the airport I go! He's flying into Huntington this time, so a nice, short drive to the airport will be pleasant. And, as usual when I have family in town, I'm guessing the blog will be sporadic next week. I'll probably get back to the normal blogging around the 18th or so. 

Happy Thursday!


Ingredients (makes ~12 cups):

1 tbsp olive oil
1 head garlic, roasted
15 lbs tomatoes, roughly chopped
1 tsp sugar
3 tbsp italian seasoning
1 tbsp kosher salt
1 tsp black pepper
1 tsp onion powder
1/2 tsp crushed red pepper
2 bay leaves
roast bone, parmesan cheese rind (optional)
fresh herbs, roughly chopped (parsley, basil, oregano, etc.) optional

Directions:

1. Heat olive oil over medium heat in a large stockpot. When warm, squeeze roasted garlic into pot. Sauté for 30 seconds to 1 minute. Add tomatoes through bone and cheese rind (if using). Stir to combine. Bring to a boil. Reduce to a simmer, and simmer for 5-6 hours, stirring occasionally. 
2. Remove from heat. Using a slotted spoon, remove bay leaves, cheese rind, and bone. Discard. Using an emulsion blender, blend sauce until smooth. Add freshly chopped herbs to the sauce, if using. Stir. Serve immediately with your favorite pasta, or begin to cool sauce for freezing. Do not package and freeze until sauce has cooled. 


Looking for other ways to use fresh tomatoes? Try these!